
VPN Troubleshooting Guide
If your VPN is stopping you from connecting to the internet, you don’t need to worry as it’s a common problem that a lot of VPN owners face. For this reason, we’ve put together the ultimate step-by-step guide for you to read through so we can get to the bottom of what’s causing this VPN-related issue and ultimately resolve it.
We have created a separate guide for Microsoft and Apple users which you will find below.
Windows Systems
We have also created an easy-to-follow video for you to watch should you prefer that over reading through our step-by-step blog:
Step 1: We need to run a few commands.
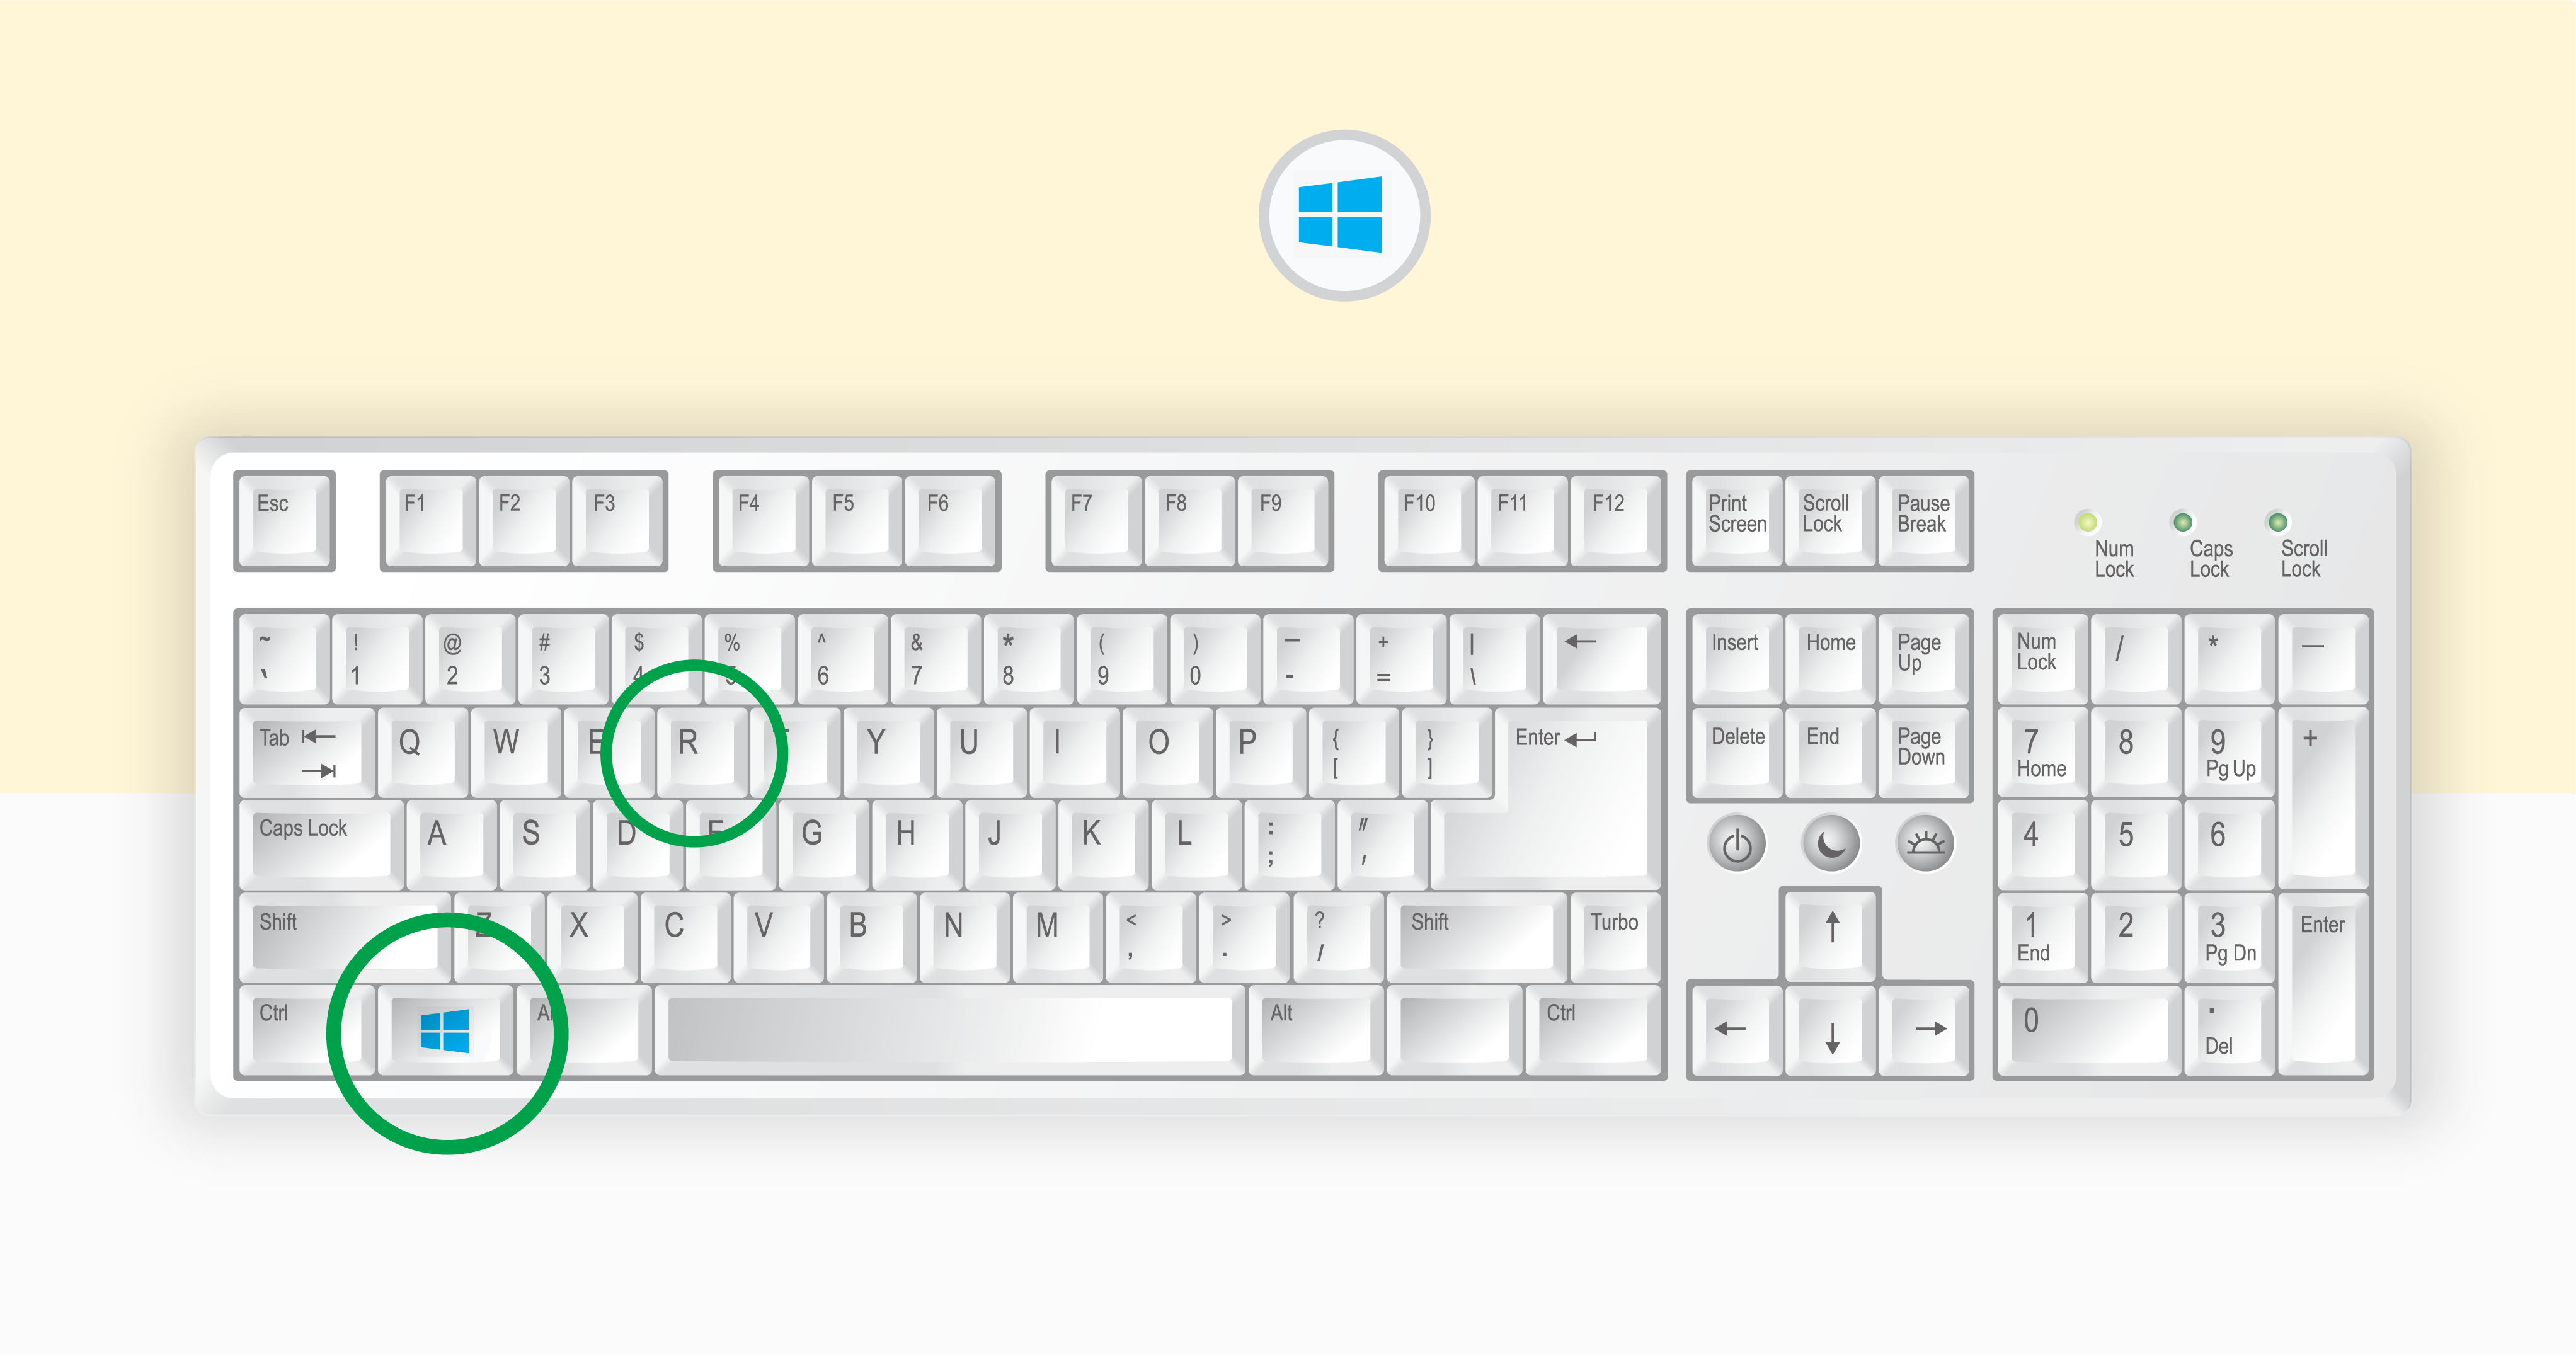
Step 1.1: To do this, hit the ‘Windows’ key and the ‘R’ key at the same time.
Step 1.2: This will bring up a small search box the ‘Run Window’.
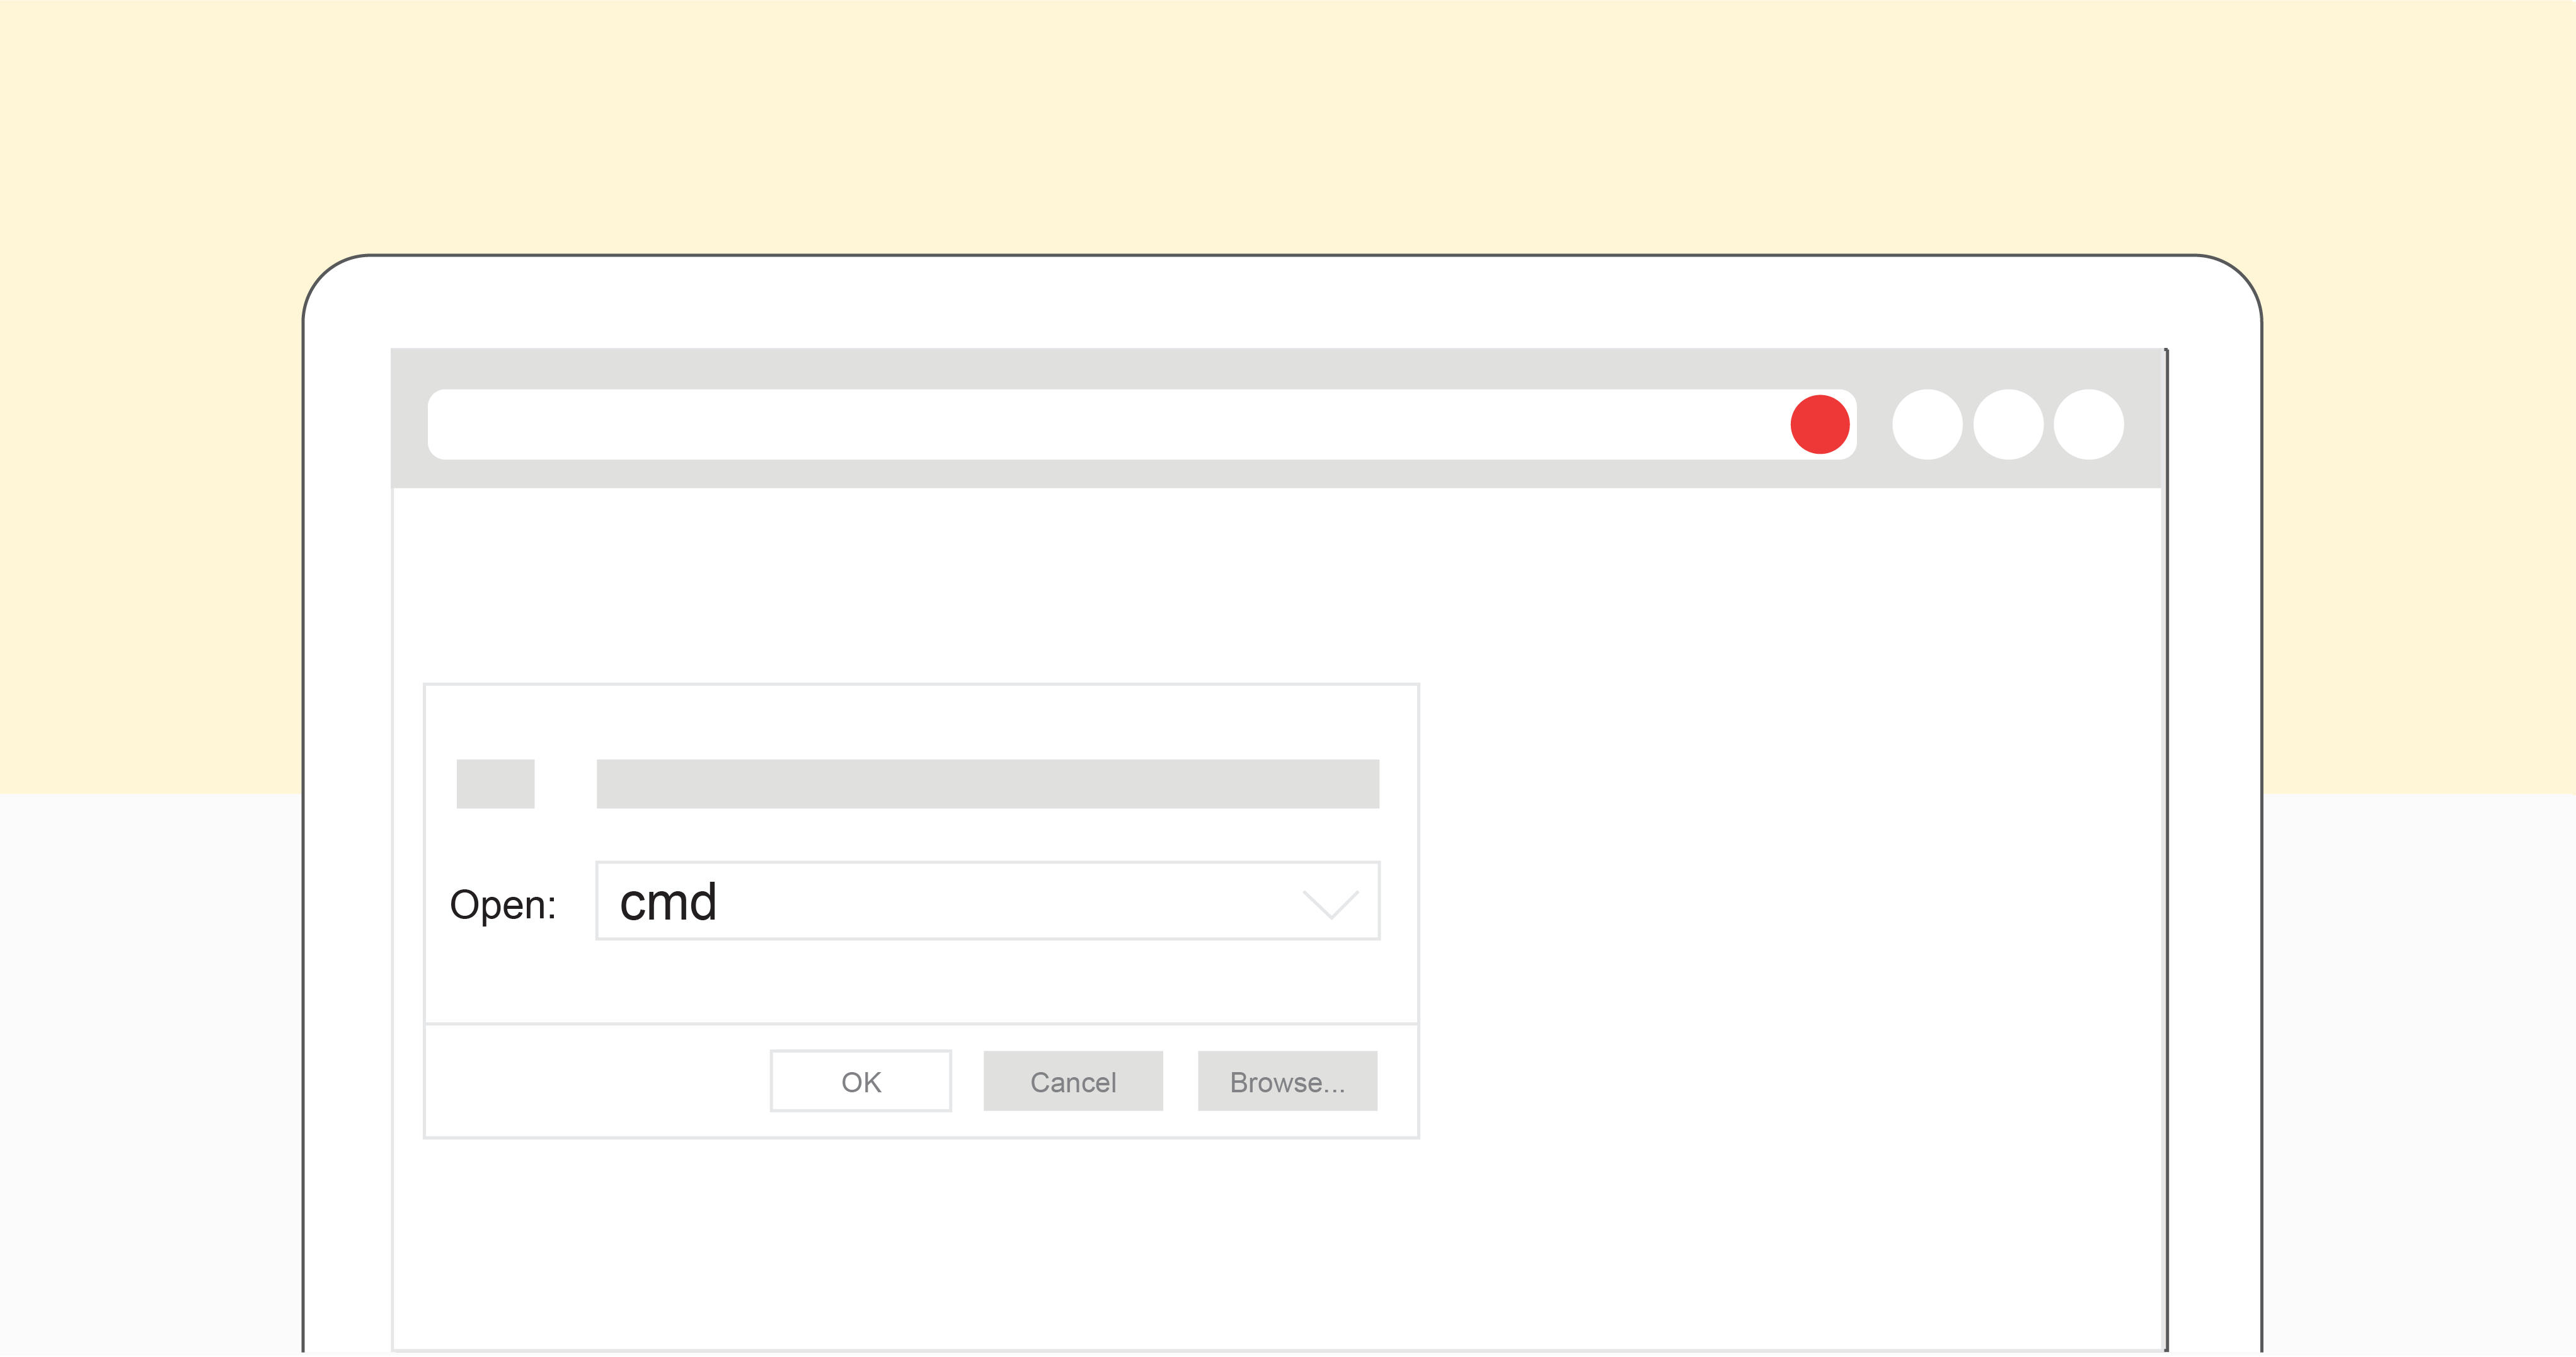
Step 1.3: Type “cmd” into the ‘Run Window’s’ search box.
Step 1.4: Hit the ‘Enter’ key.
Step 2: A black box will pop up on your screen.
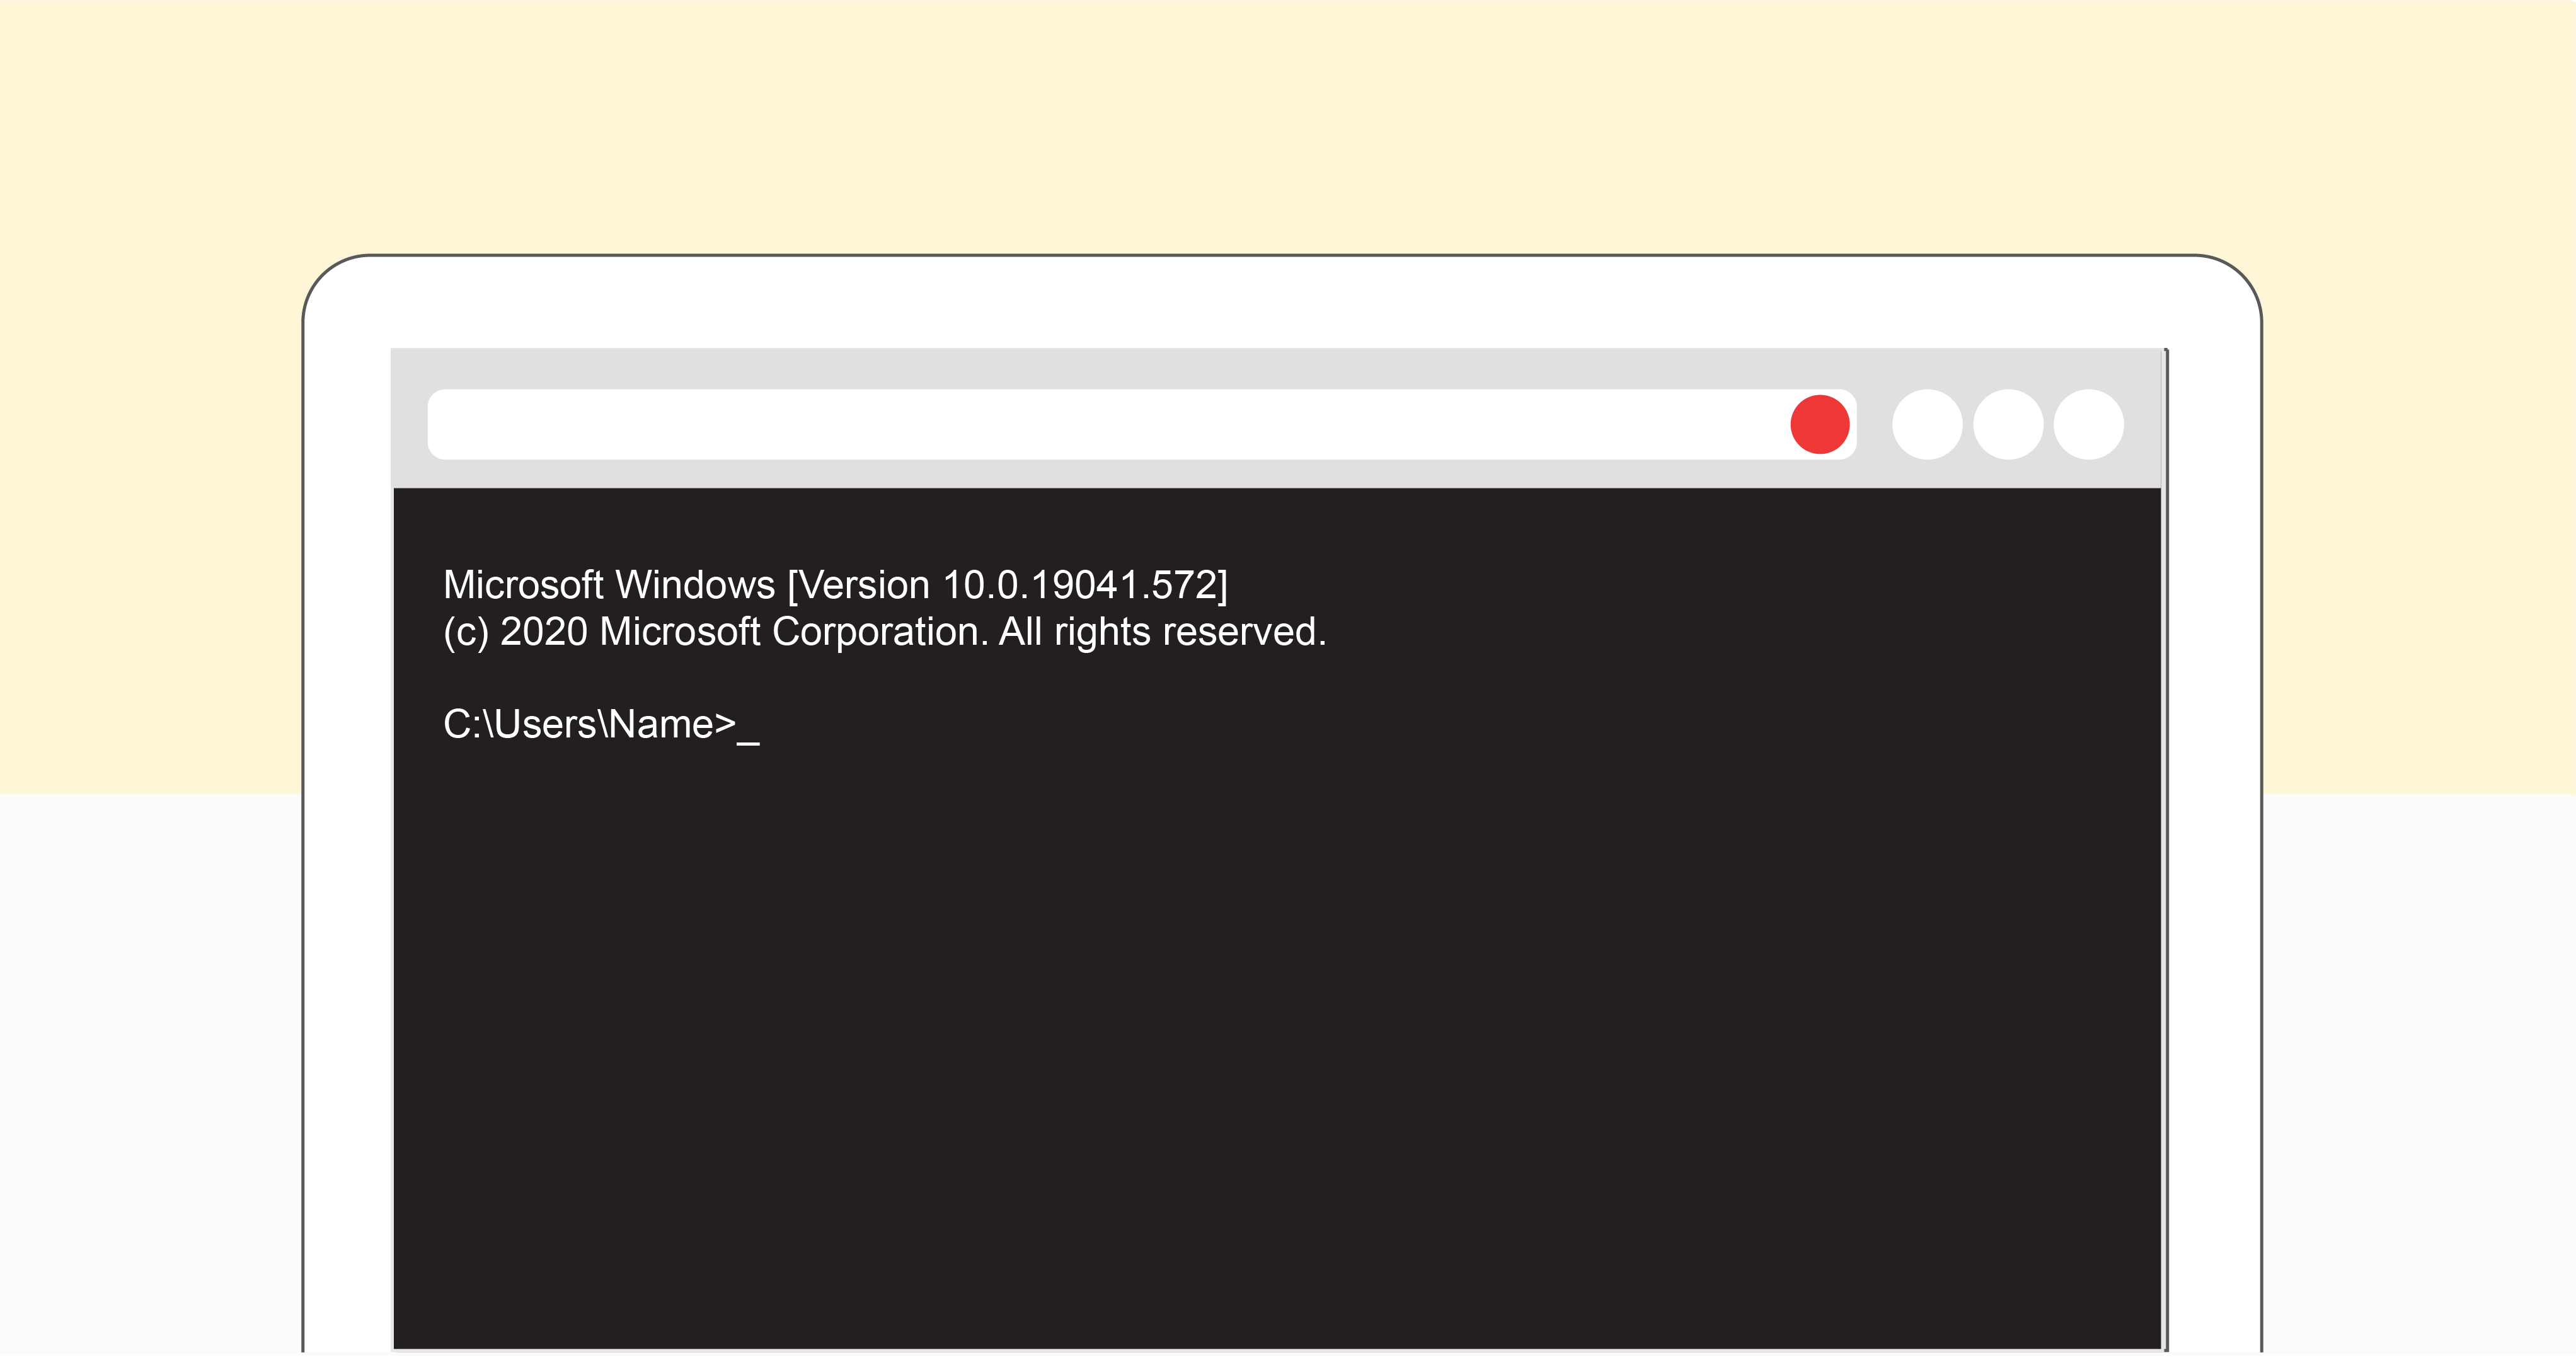
Step 2.1: Look for the little flashing line – this is your prompt to type a command for your computer to run.
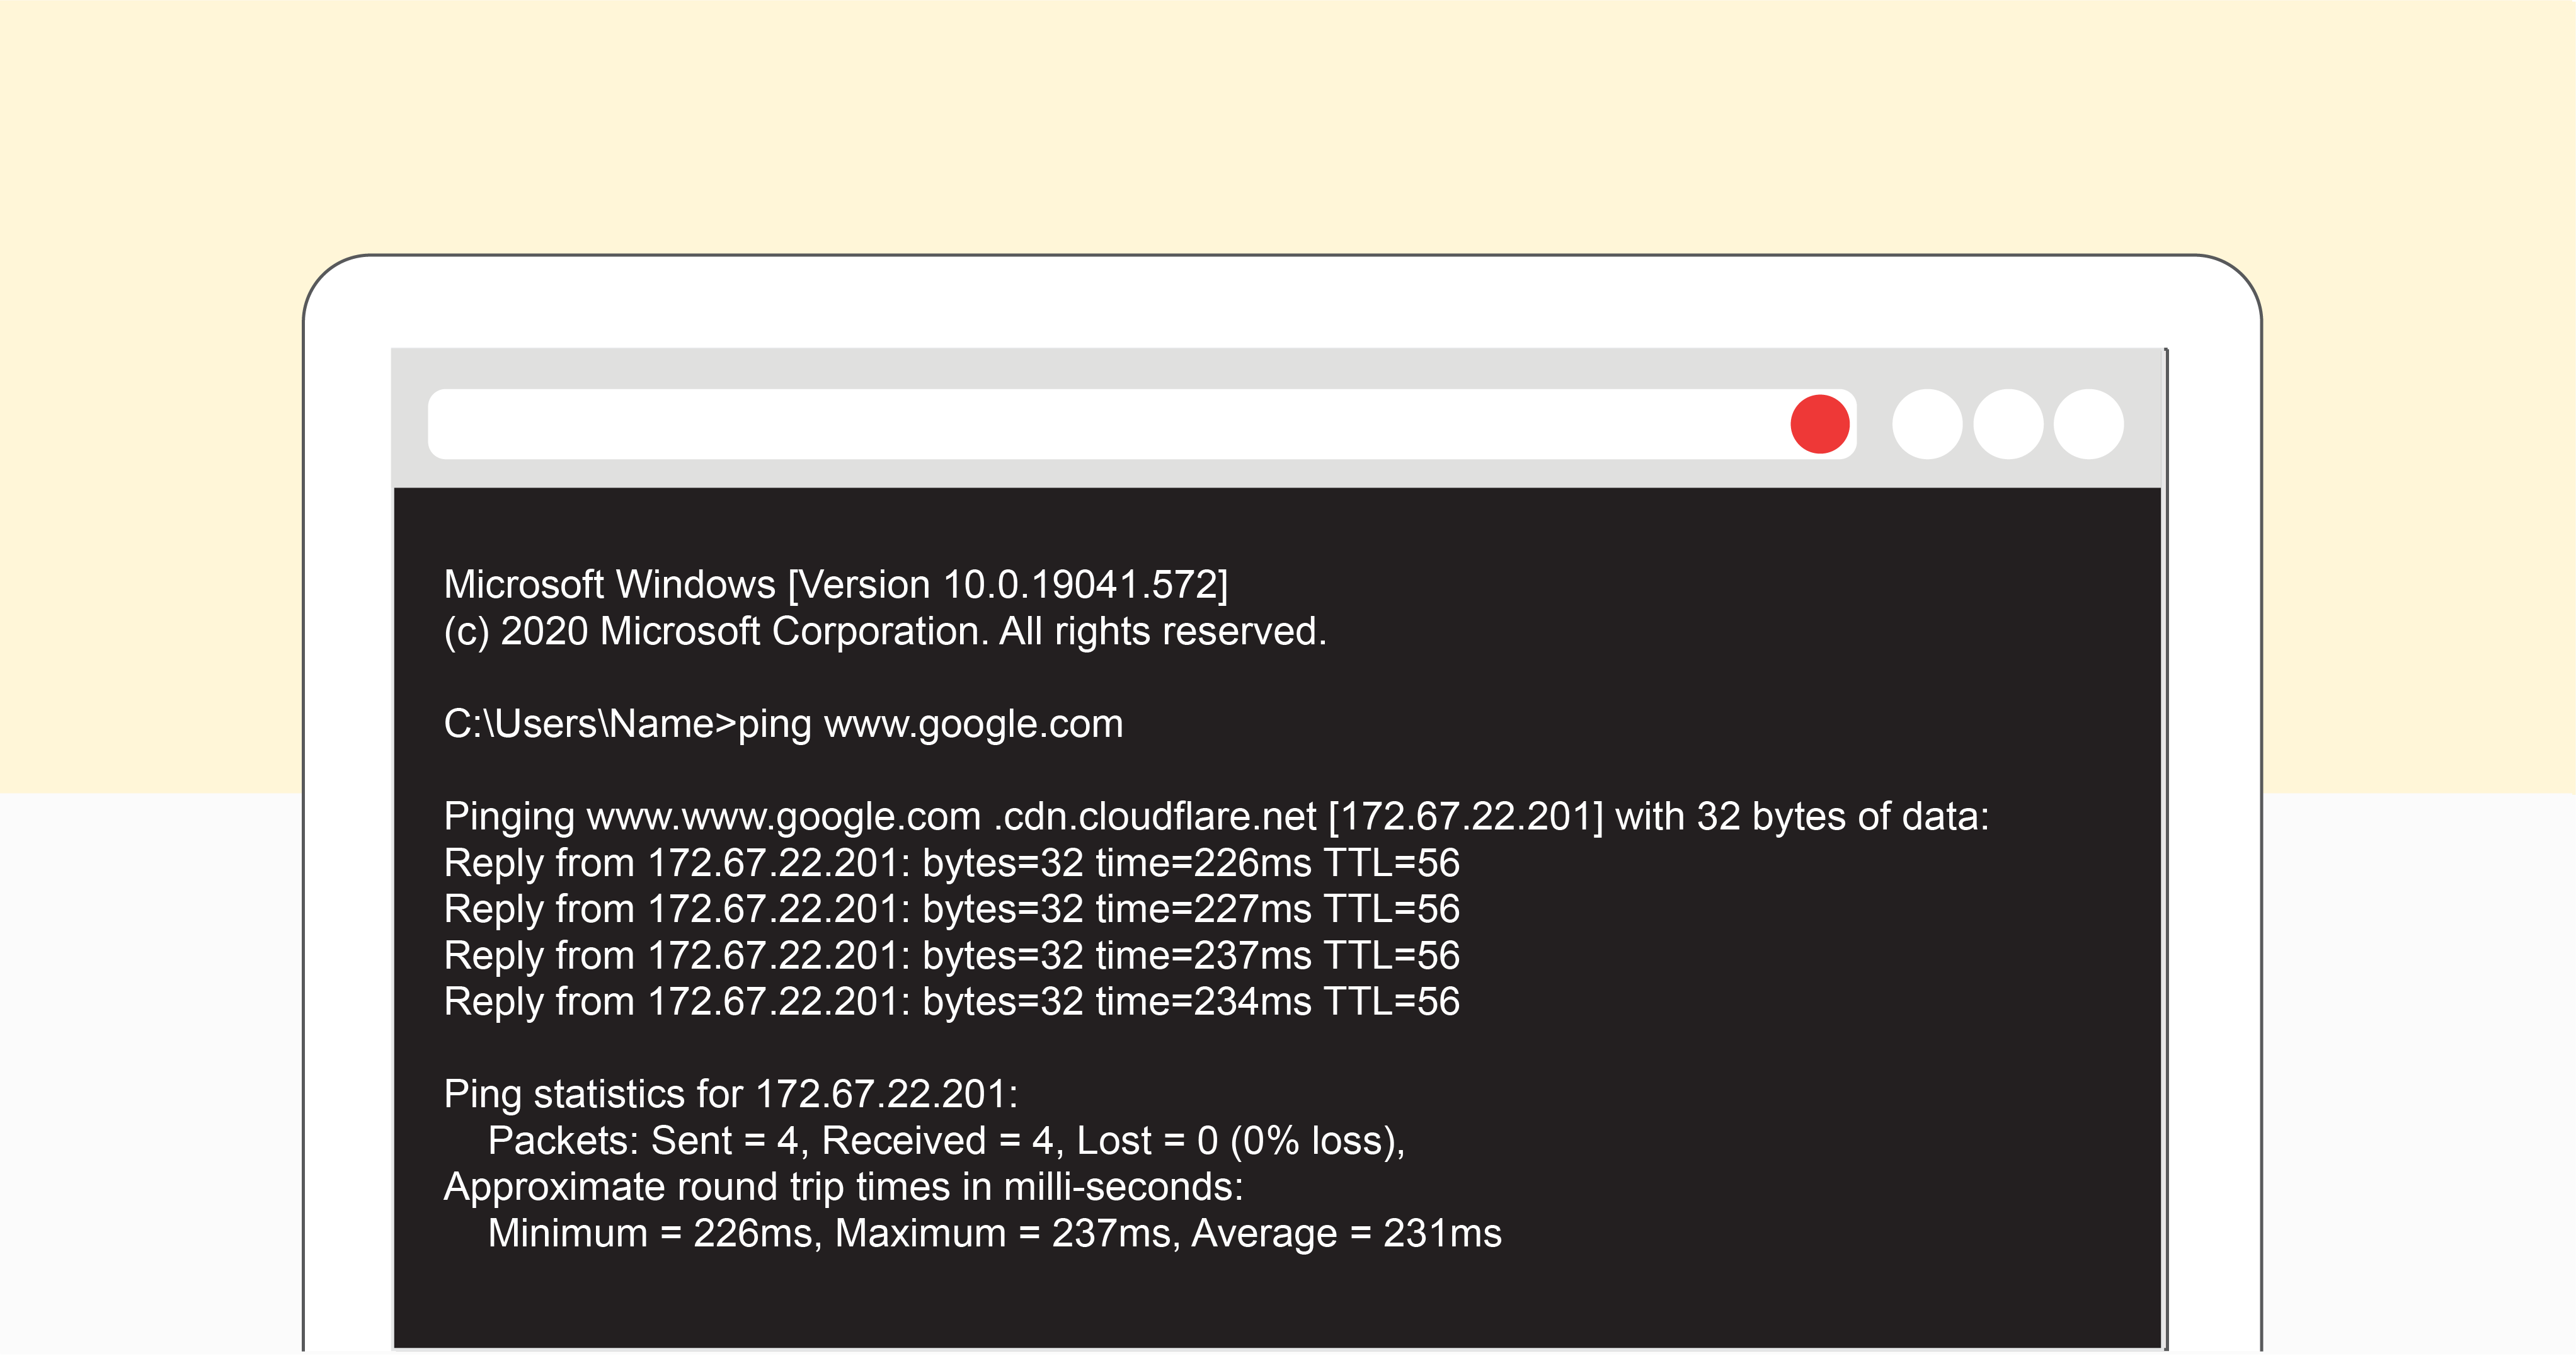
Step 2.2: At the prompt, type “ping” along with the URL or IP address you want to ping and hit ‘Enter’.
Step 2.3 To obtain your IP address numbers open up your internet browser and type the following into your Google search bar: ‘’What is my IP address?’’. Right at the top of the list, you should see ten numbers. This is your IP address.
Step 2.4: You will need to ping Google.com to see if you are getting any replies – so, type in ‘’ping www.google.com’’ and hit enter.
Step 3: If you are getting timeout errors, then you will need to do a trace route test so we can see where the connection is stopping.
Step 3.1: To do this, type “tracert” along with the URL or IP address you want to do a trace route test on. – “tracert www.google.com’’
Step 4: Please ensure that you take a screen shot of the test’s results.
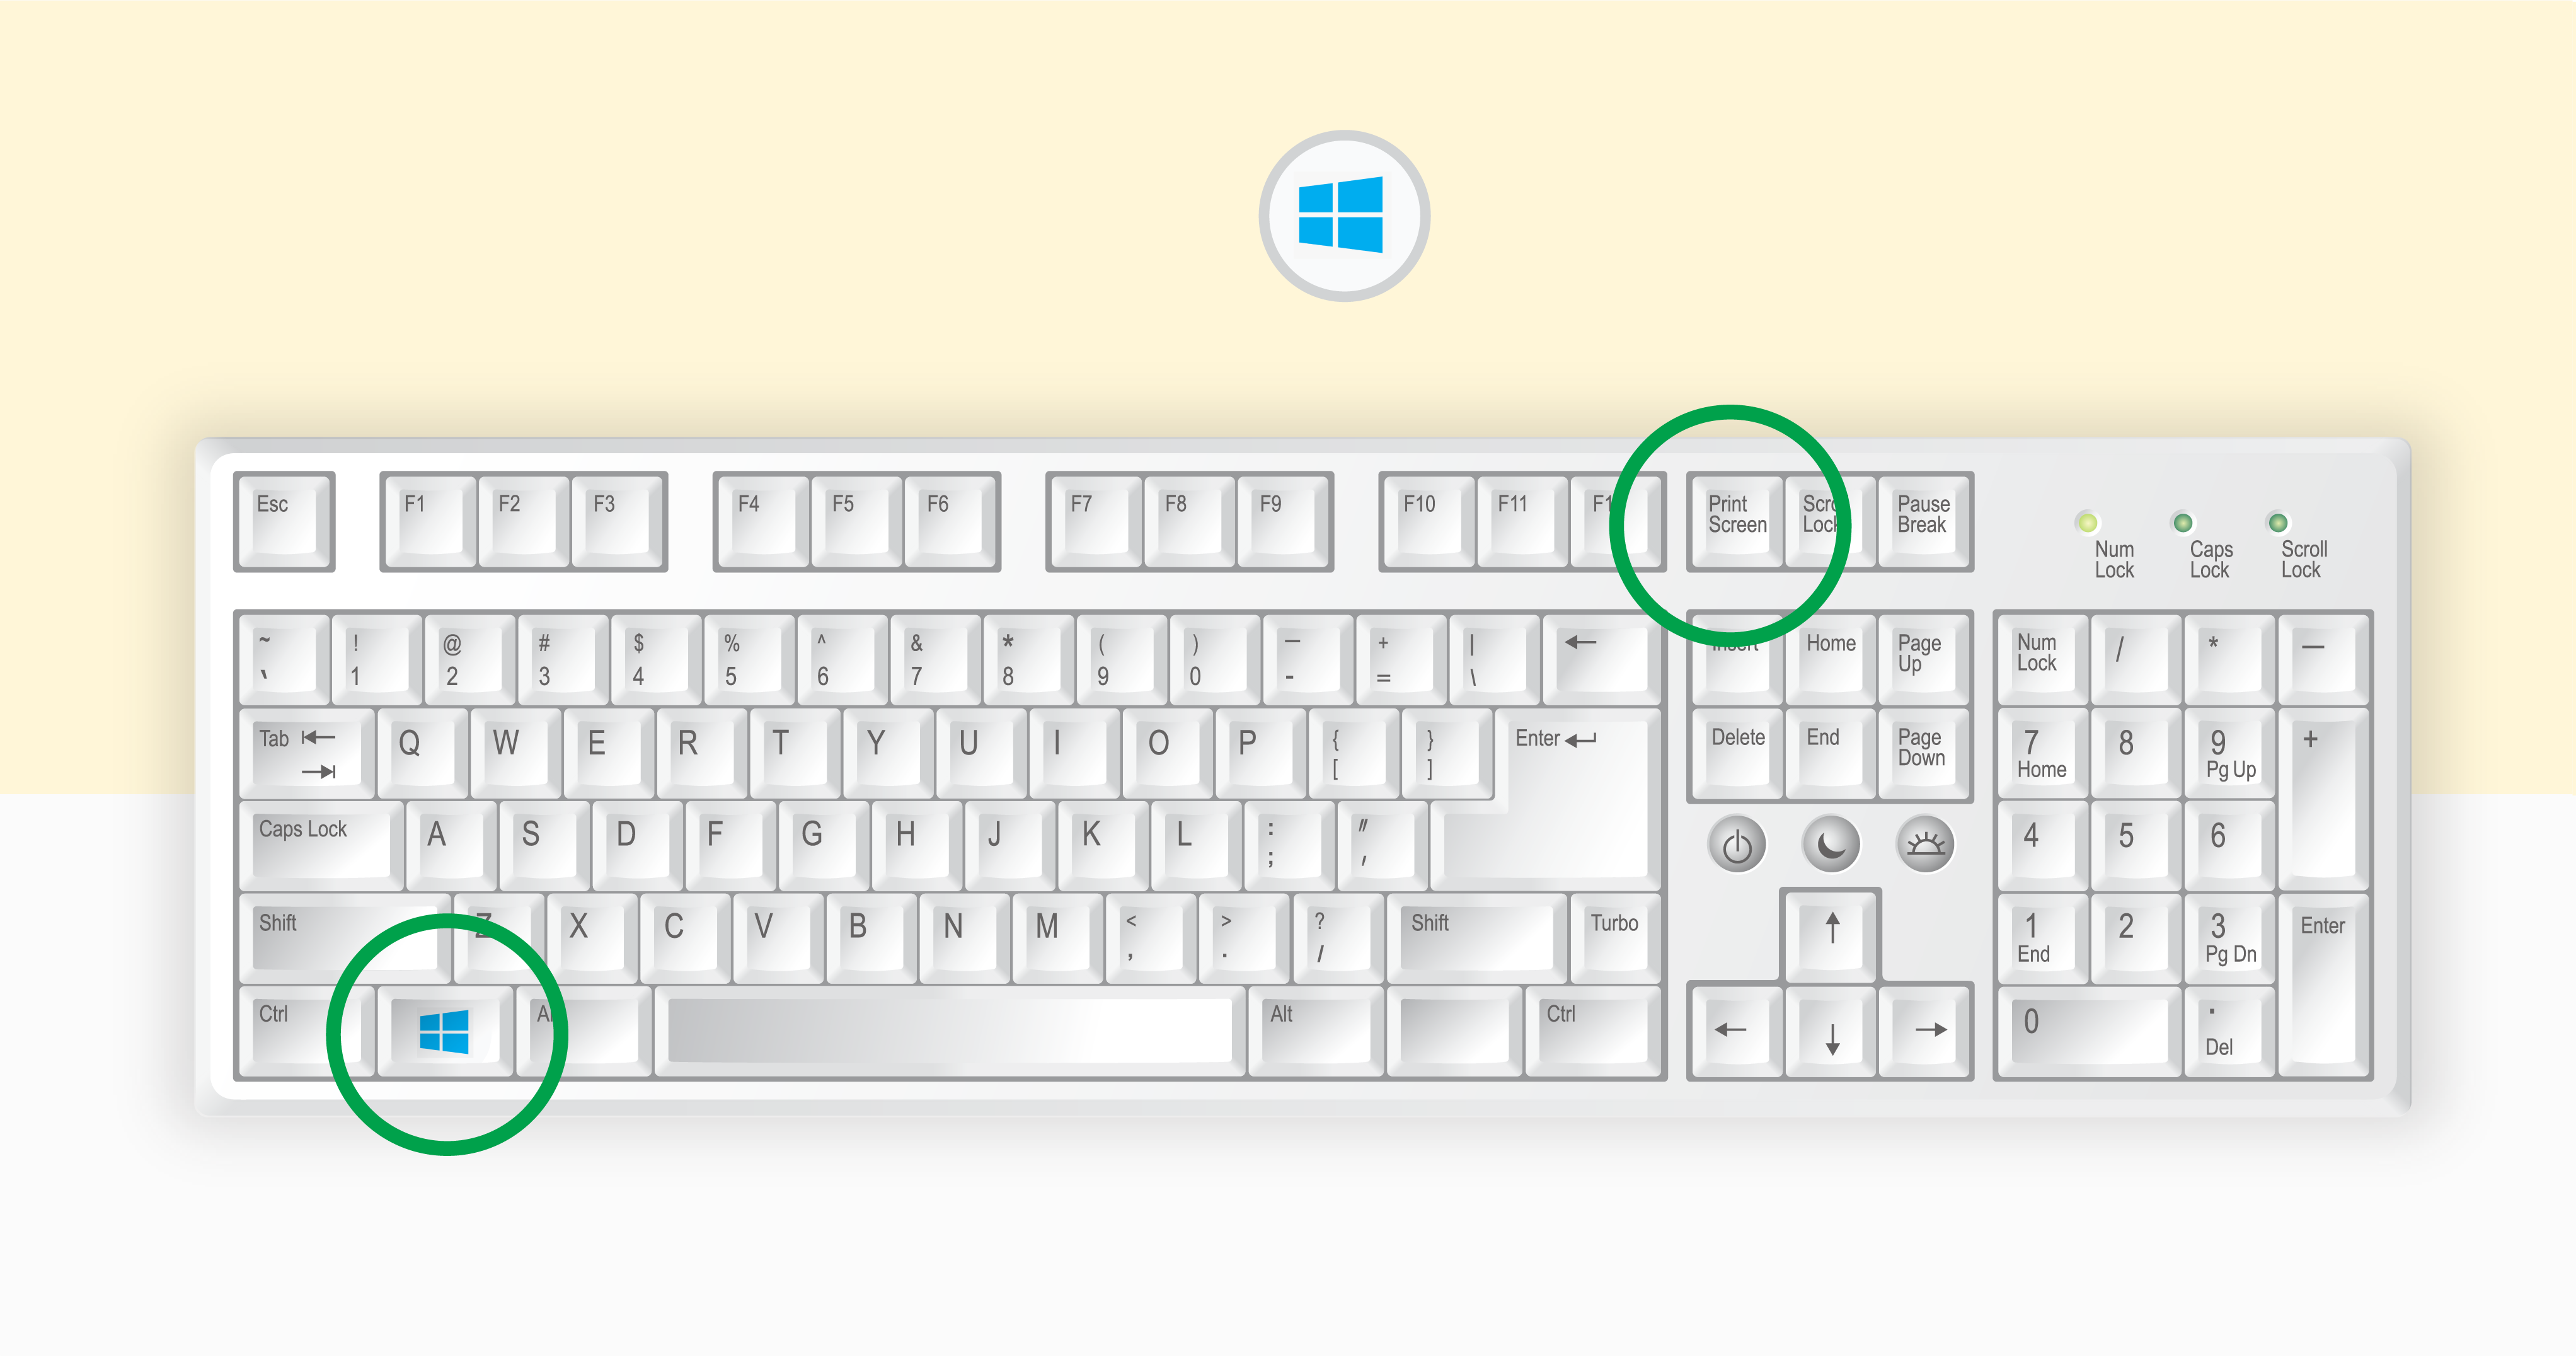
Step 4.1: To do this press the ‘Windows’ key and the ‘Print Screen’ keys simultaneously.
Step 4.2: To locate your screenshots folder, navigate to the search bar on your task bar, type in ‘Screenshots’ and press enter.
Step 5: Email your screen shot to [email protected] so we may help you further.
Step 5.1: Please use the following subject line: VPN – Windows
Step 5.2: Ensure you mail us from the same email address connected to your RSAWEB account.
Step 5.3: If you are not the account holder, please include the following information in your email – account number, name, surname, and contact number. You can find your account number on your invoices, if you don’t know how to access your invoices simply navigate here: https://www.rsaweb.co.za/accessing-invoices-and-statements-from-myrsaweb/.
Step 6: Wait for feedback from one of our support stars.
Mac Systems
We have also created an easy-to-follow video for you to watch should you prefer that over reading through our step-by-step blog:
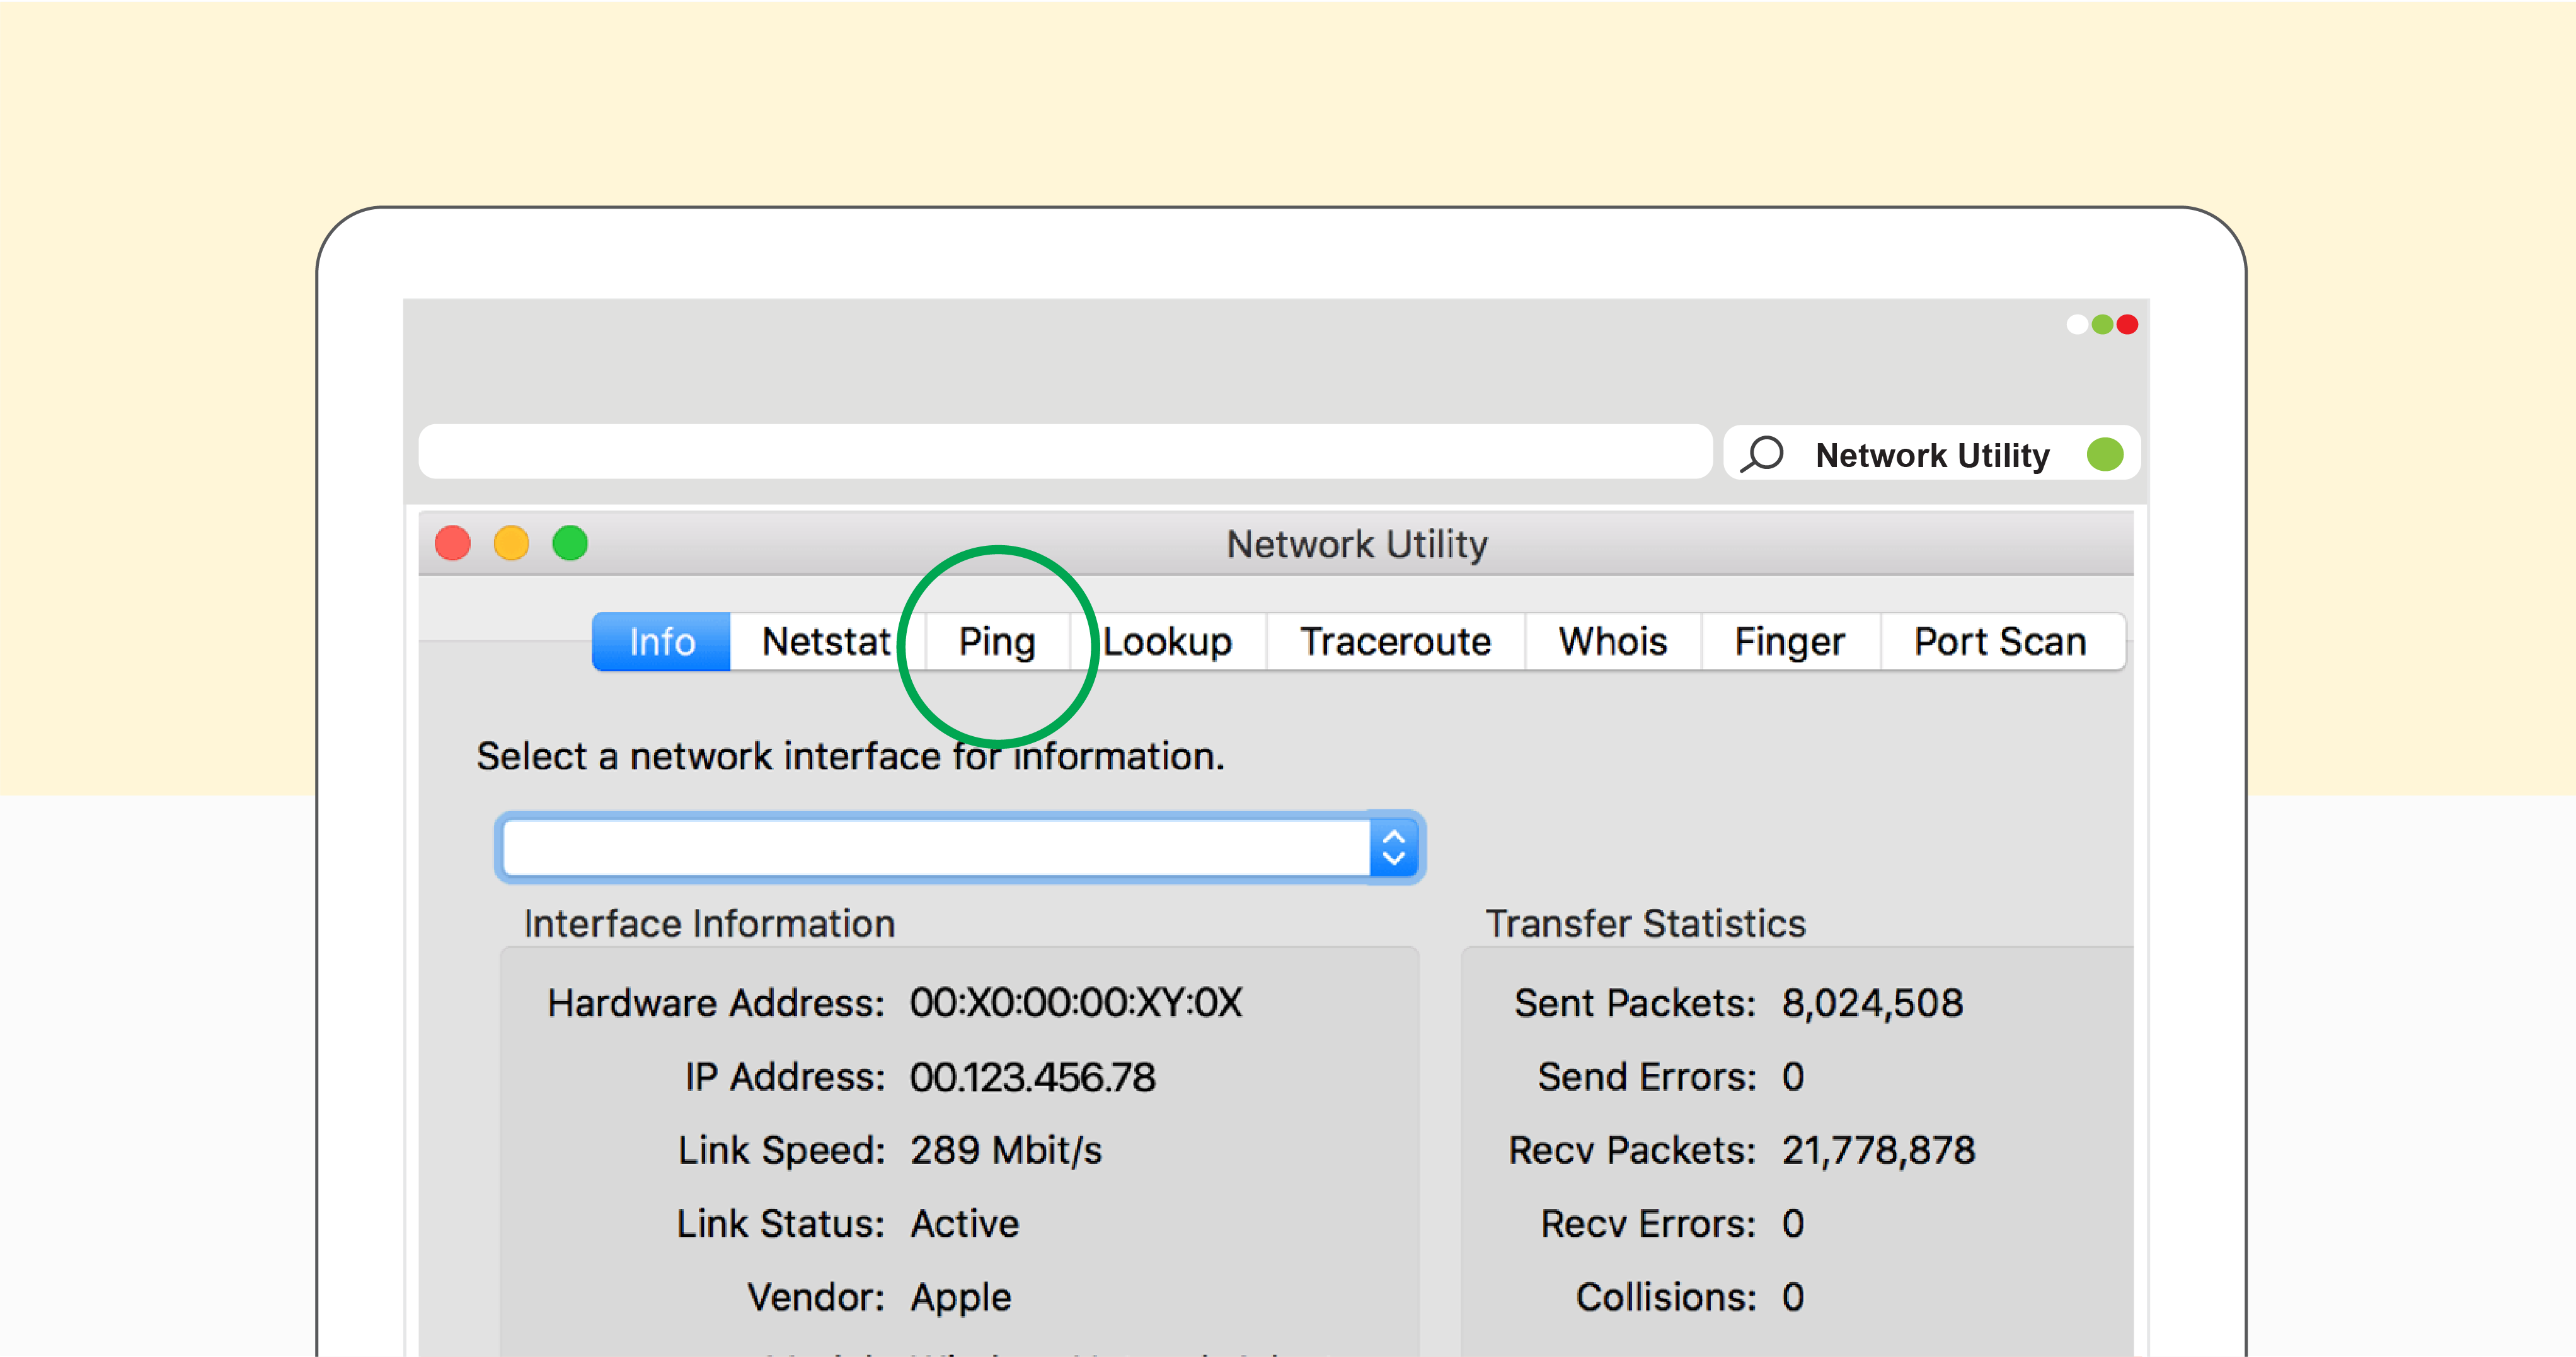
Step 1: On your Apple system, open the Network Utility app which can be fund using your search bar. Type in Network utility and click enter.
Step 1.1: Once the Network utility app is open, click the Ping tab.
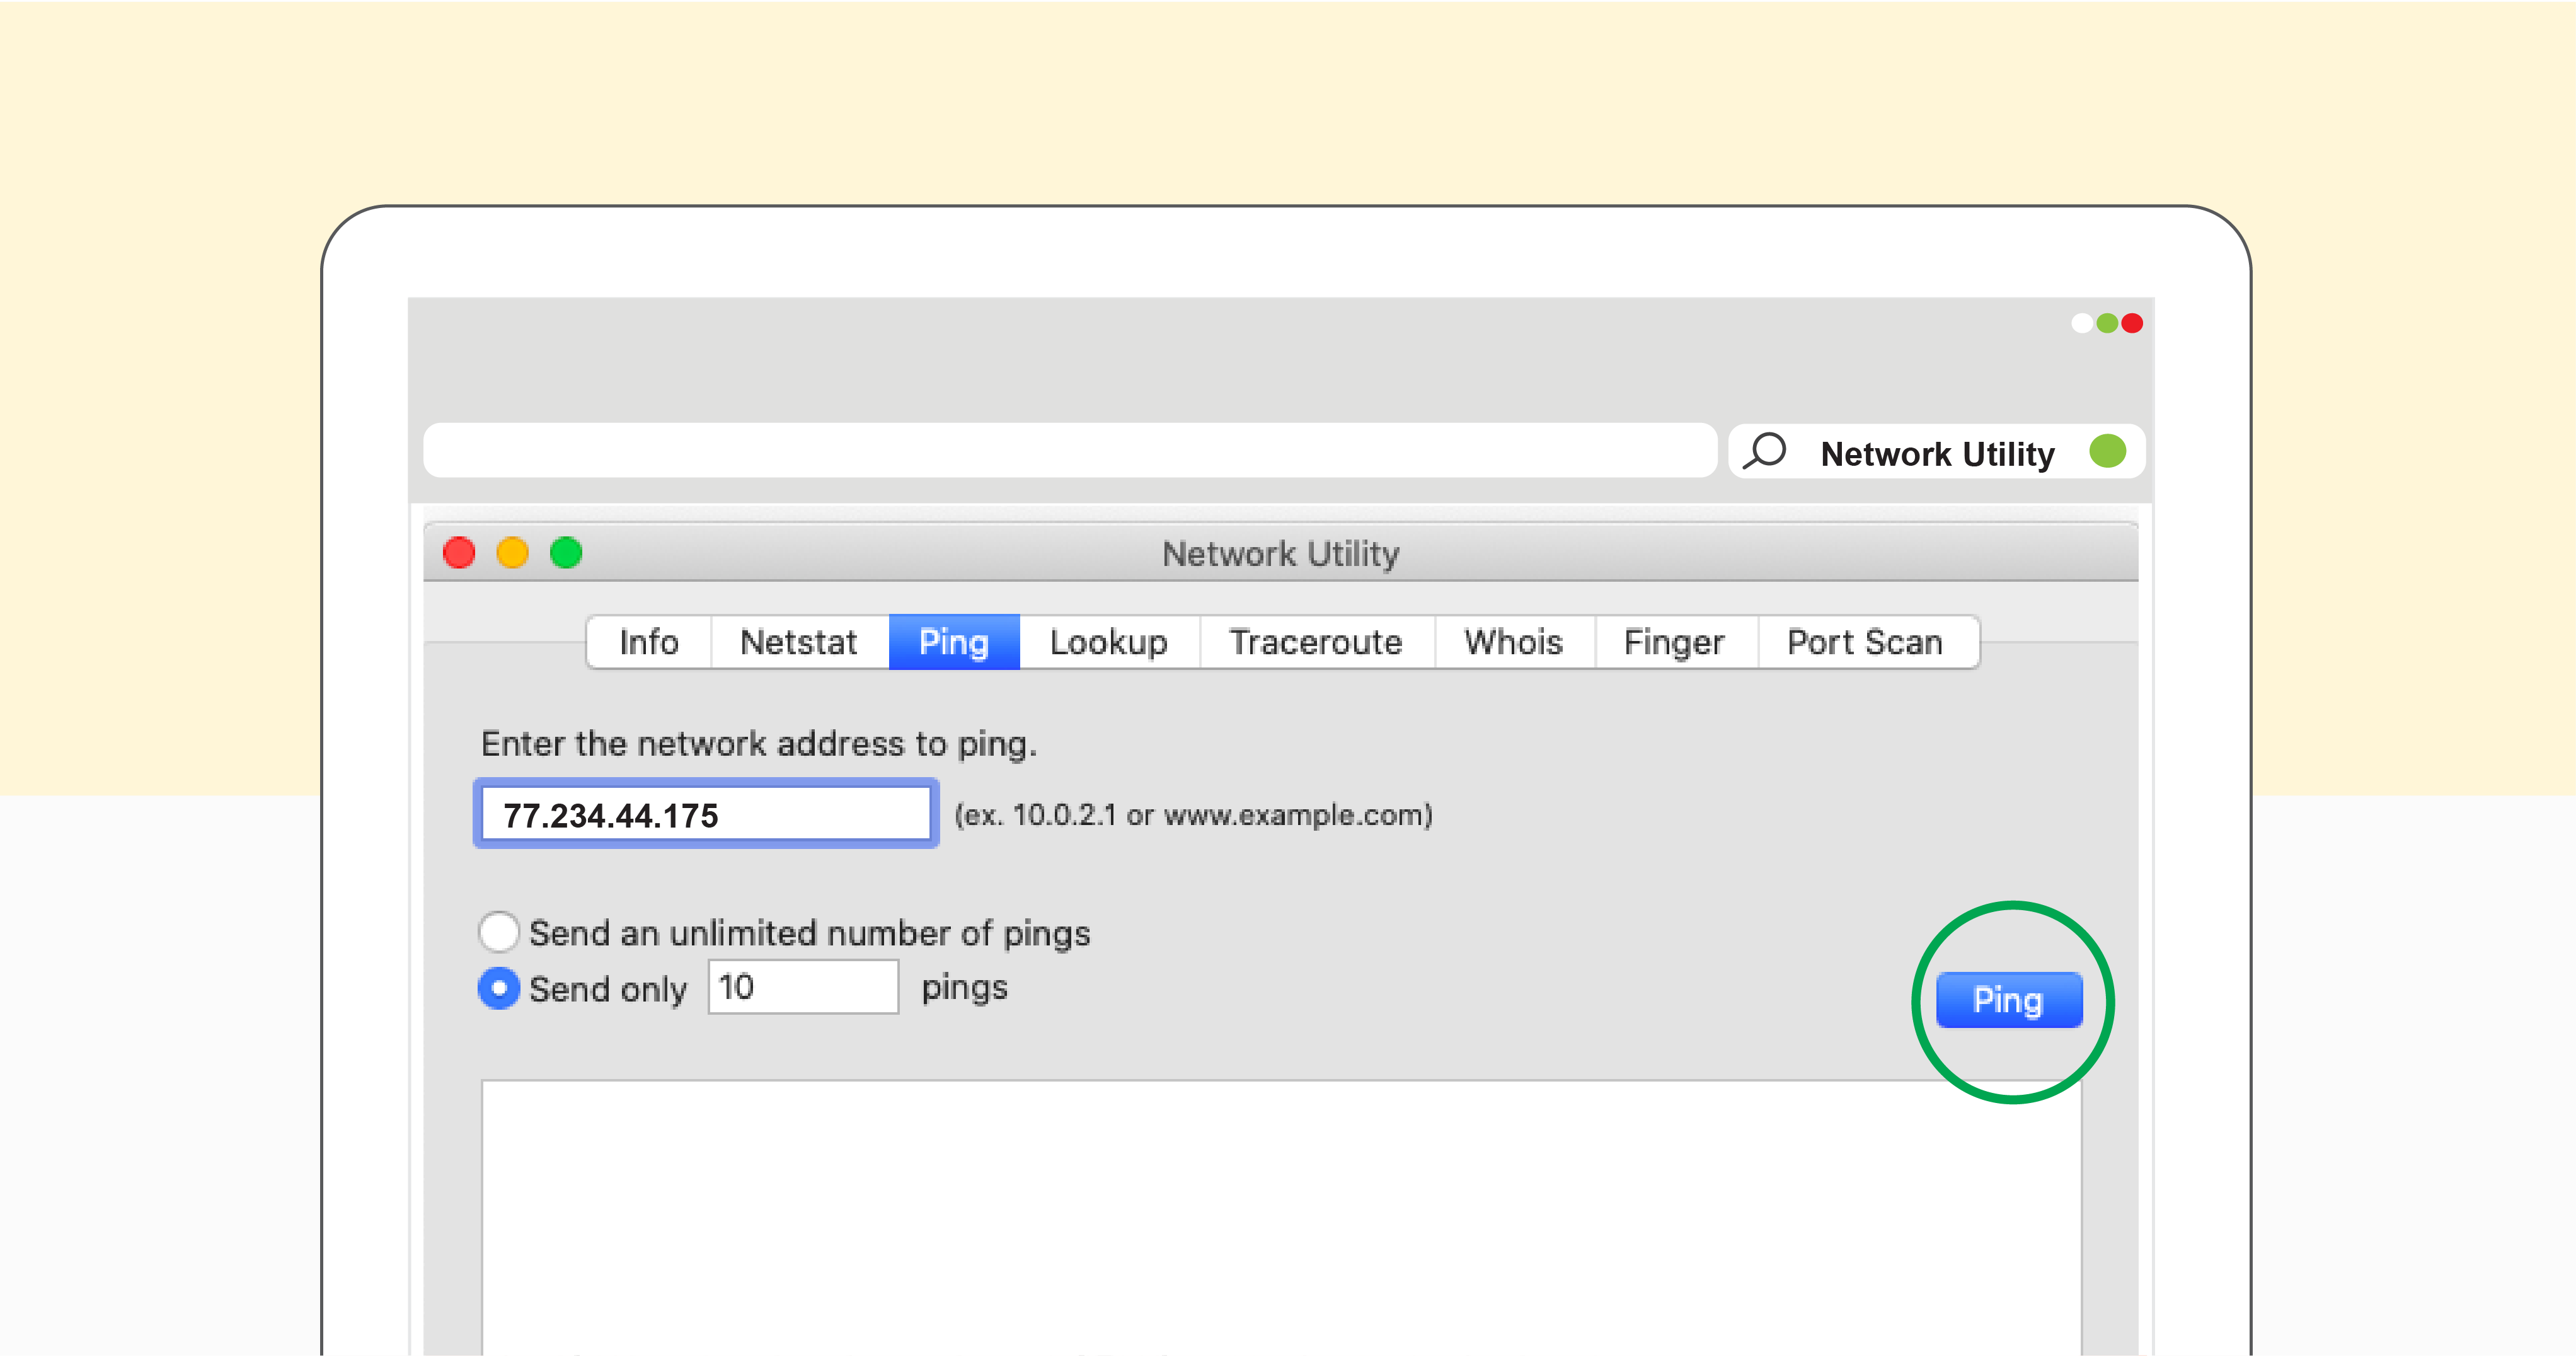
Step 2: Enter your IP address and then click the Ping button.
Step 2.1: To obtain your IP address numbers open up your internet browser and type the following into your Google search bar: ‘’What is my IP address?’’. Right at the top of the list, you should see ten numbers. This is your IP address.

Step 3: Please ensure that you take a screenshot of the test’s results.
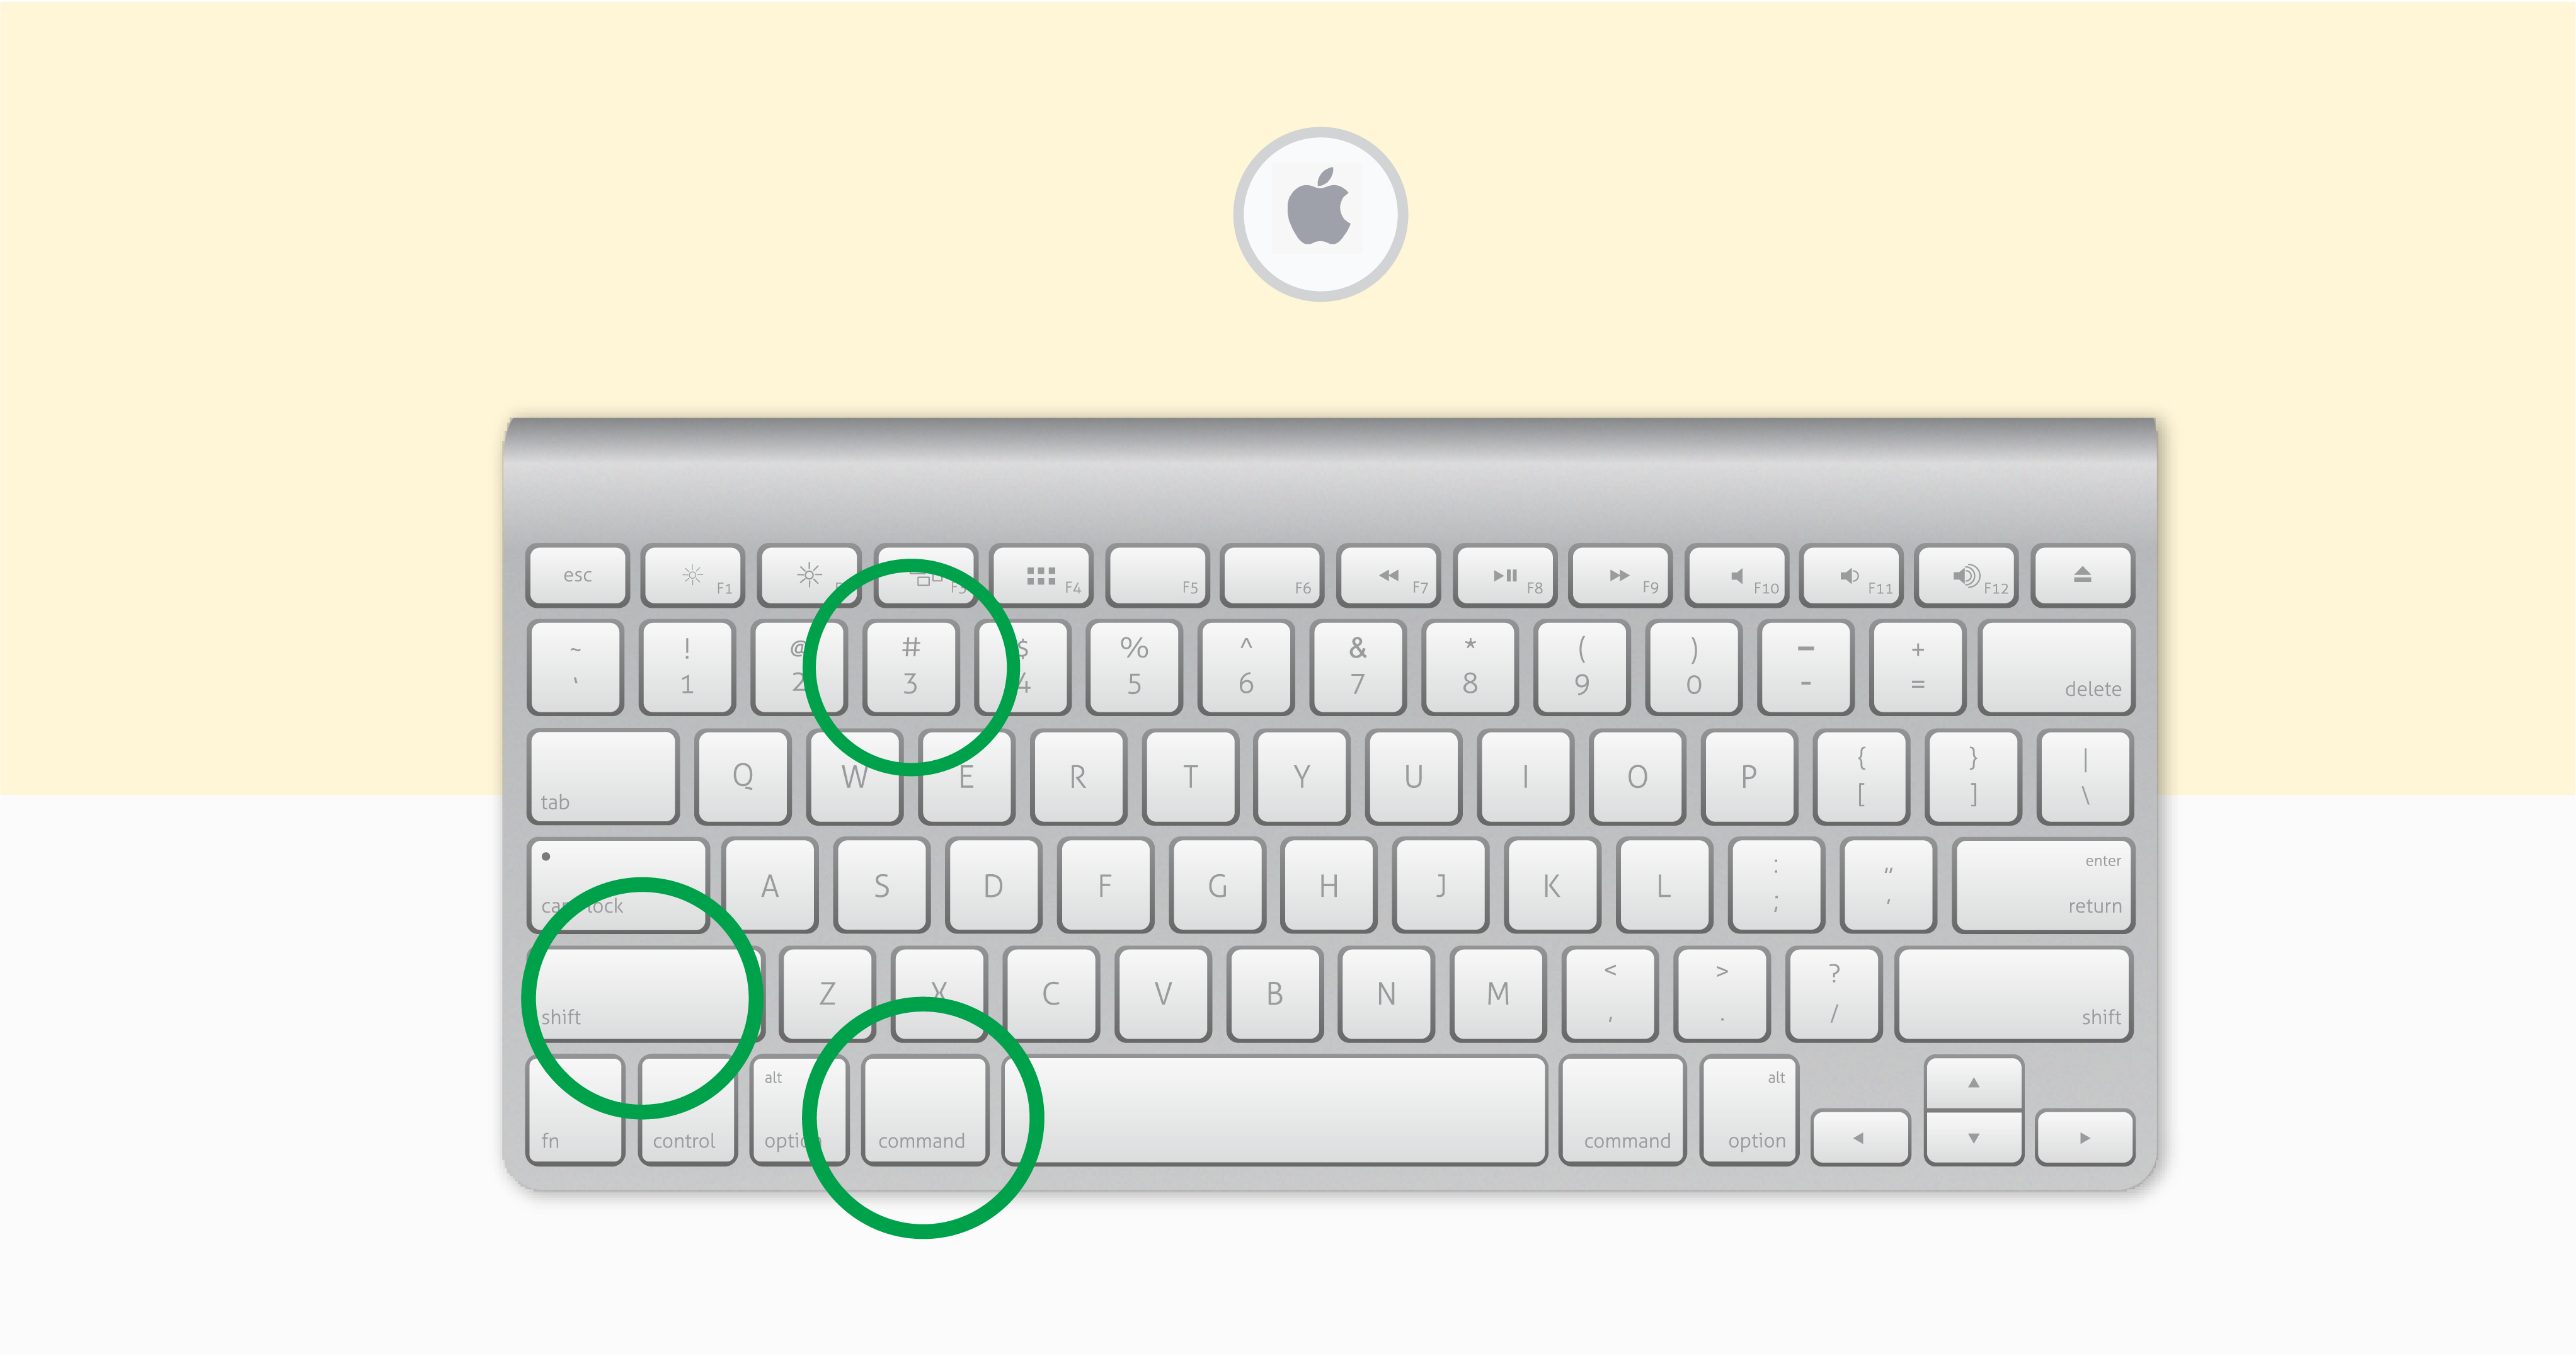
Step 3.1: For Mac operating systems, press the ‘’Command’’, ‘’Left Shift’’ and ‘’Number 3’’ keys simultaneously.
Step 3.2: To locate your screenshots folder, navigate to the magnifying glass icon, type in ‘Screenshots’ and press enter.
Step 4 Repeat the above Steps 3 and 4 with your VPN server and VPN IP address.
Step 4.1: You are able to get VPN server from your VPN provider.
Step 5: Email all of your screenshots to [email protected] so that we may help you further.
Step 5.1: Please use the following subject line: VPN – Apple
Step 5.2: Ensure you mail us from the same email address connected to your RSAWEB account.
Step 5.3: If you are not the account holder, please include the following information in your email – account number, name, surname, and contact number. You can find your account number on your invoices, if you don’t know how to access your invoices simply navigate here: https://www.rsaweb.co.za/accessing-invoices-and-statements-from-myrsaweb/.
Step 6: Wait for feedback from one of our support stars.
